Everyone knows the standard definition for chaos: disorder and confusion. However, for our recently completed bar top replacement, the world of physics provides something more apropos:
Chaos: Behavior so unpredictable as to appear random,
owing to great sensitivity to small changes in conditions.
In spite of appearances, the Gallivance mantra is “keep the project as simple as possible.” If we can avoid acquiring new gear (e.g. tile saw), we do it. Skipping messy steps … sign us up. To this end, Terri discovered an article in Family Handyman magazine that had a bar top design plan which called for cutting the wooden base to the exact size to fit the tile, rather than cutting the tile to fit the top. Sounds simple, right? Cutting wood has to be easier than cutting tile, right?
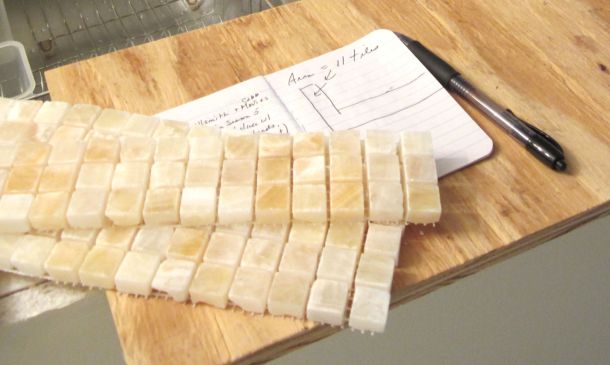
We picked out a nice, onyx mosaic tile on a mesh backing, that we planned to lay on a sticky-backed product called Bondera, thus avoiding the gooey quickset step. And with plan and supplies in hand, as well as a self-imposed pre-Christmas deadline, away we went.
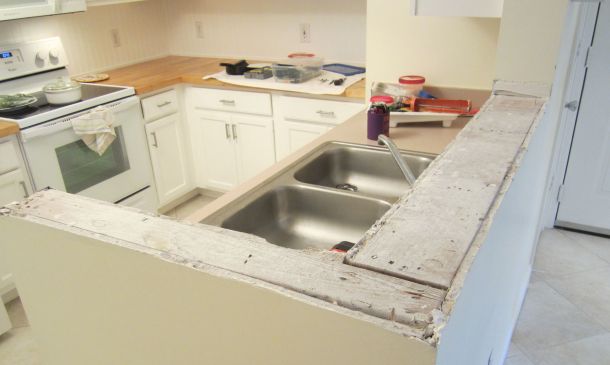
Step 1 – Remove old (pink) bar top.
To get us off on the right foot, the first step revealed the first surprise … a rugged, unlevel base underneath.
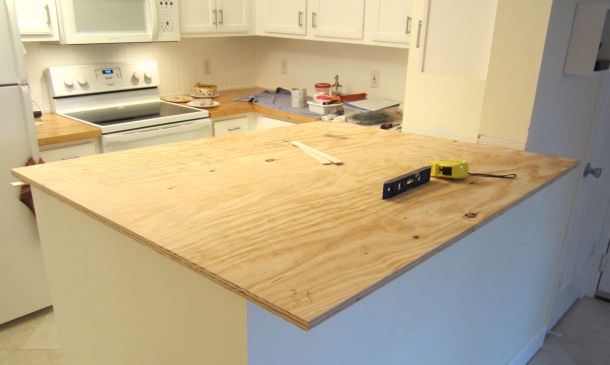
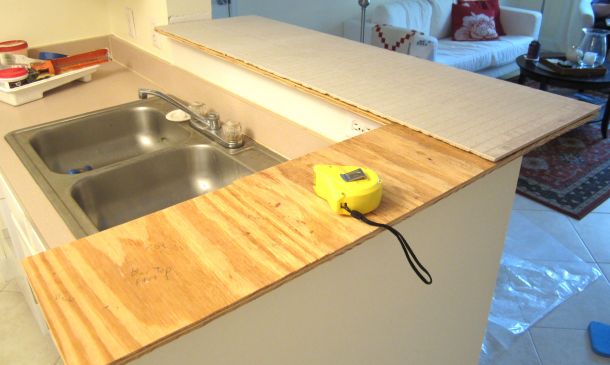
Step 2 – Measure, mark, and cut the plywood.
The requirement for EXACT dimensions added a bit of stress to this step.
Step 3 – Measure, score, and break the backer board as per manufacturer’s instructions.
The breaking was easier than we thought it would be, but because our boards needed more precision, they took a bit of “tidying up” with a jigsaw. It’s funny how quickly cement dulls a jigsaw blade.
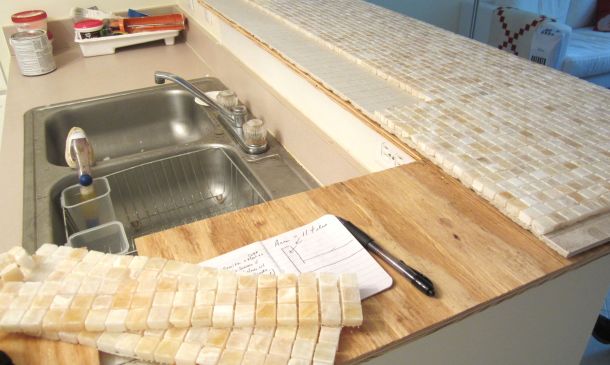
Step 4 – Lay out a test fit.
This step taught us that crossed-fingers are no substitute for skill with a tape measure and saw. A few board bloopers required some minor adjustments. And even though the corbels look simple, getting them installed, and level, was no walk in the park.
Step 5 – Pull it all together.
I put this photo in to impress you with my precision. It really was the nicest corner!

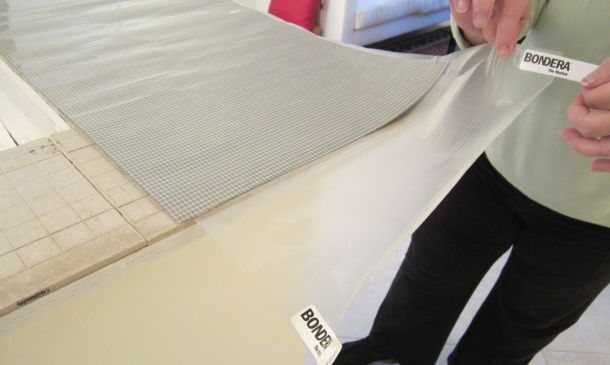
Step 6 – Measure, cut, and install Bondera.
It’s amazing how sticky this stuff is, but Terri had it sussed.
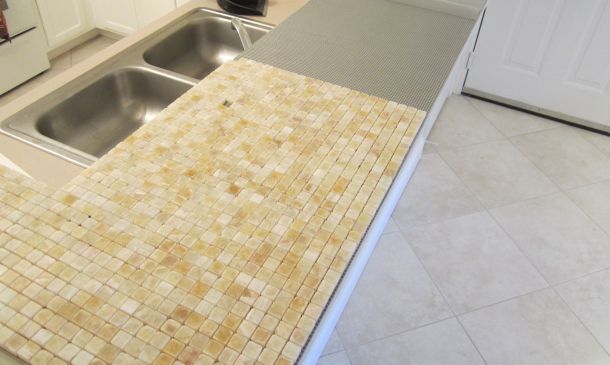
Step 7 – Layout the tile.
Once the tile was on the Bondera, there wasn’t much wiggle room. It was definitely a two-person job, and it had to be right the first time.
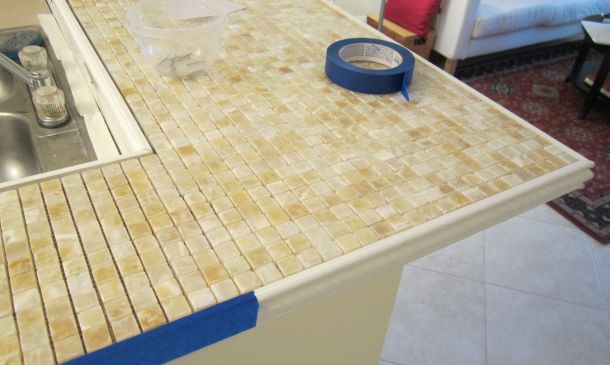
Step 8 – Install and tape the moulding.
If you’ve ever mitered moulding, you know that I’ve omitted a number of steps here, but I just can’t relive it.
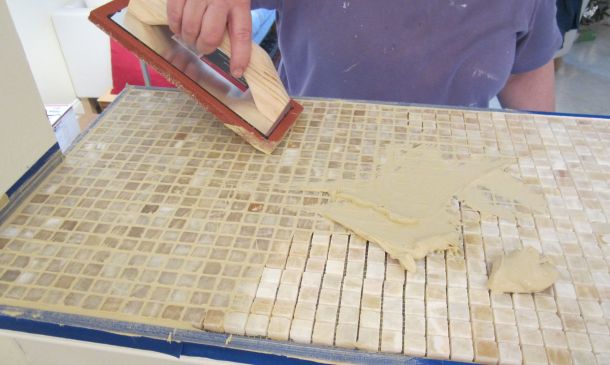
Step 9 – Apply Grout.
Once again, it was a clear division of duties. I mixed the grout and spaded the blobs into place, and Terri skillfully did the troweling.
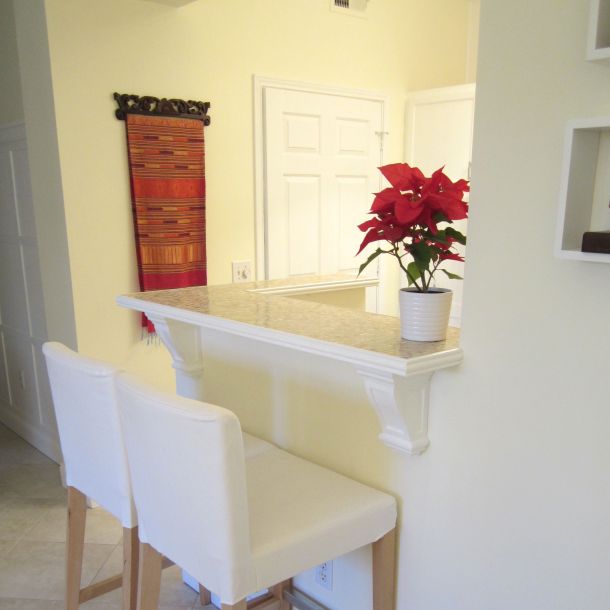
Step 10 – Stand back and admire the finished product.
Then pour a drink.
Step 11 – Ta-da!
We’re thrilled with the outcome, and we’ll be drinking our Christmas eggnog at the bar.
Merry Christmas from BCG,
James and Terri
Last Updated September 7, 2023

So impressive! Just read your whole renovation series – what fun! (Seriously – right up my alley!)
Lexie, I’m so happy that you read this series of posts, because it motivated me to go back and read them. That meant that I could have the satisfaction for finishing the job, without actually doing the job. BTW, what inspired you to dig up this old series of posts? Is there a renovation in your future? ~James
No, I just saw a “related post” link at the bottom and remembered that I wanted to read about your St Simons time anyway! (My parents live there, and we would maybe like to also someday.) I also loved the concept of living somewhere while rehabbing and then moving on. The only problem is I’m the only rehabber in my house; my husband hates it and is not at all handy!